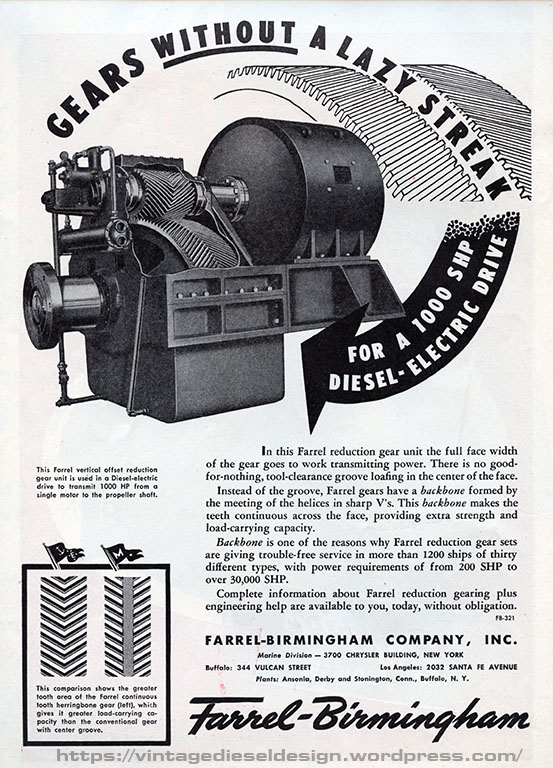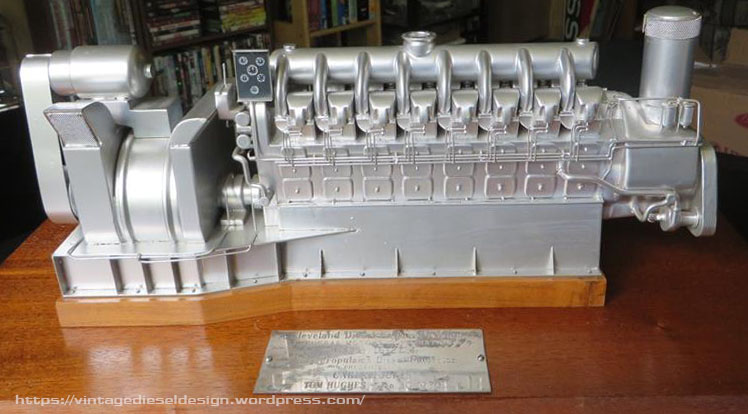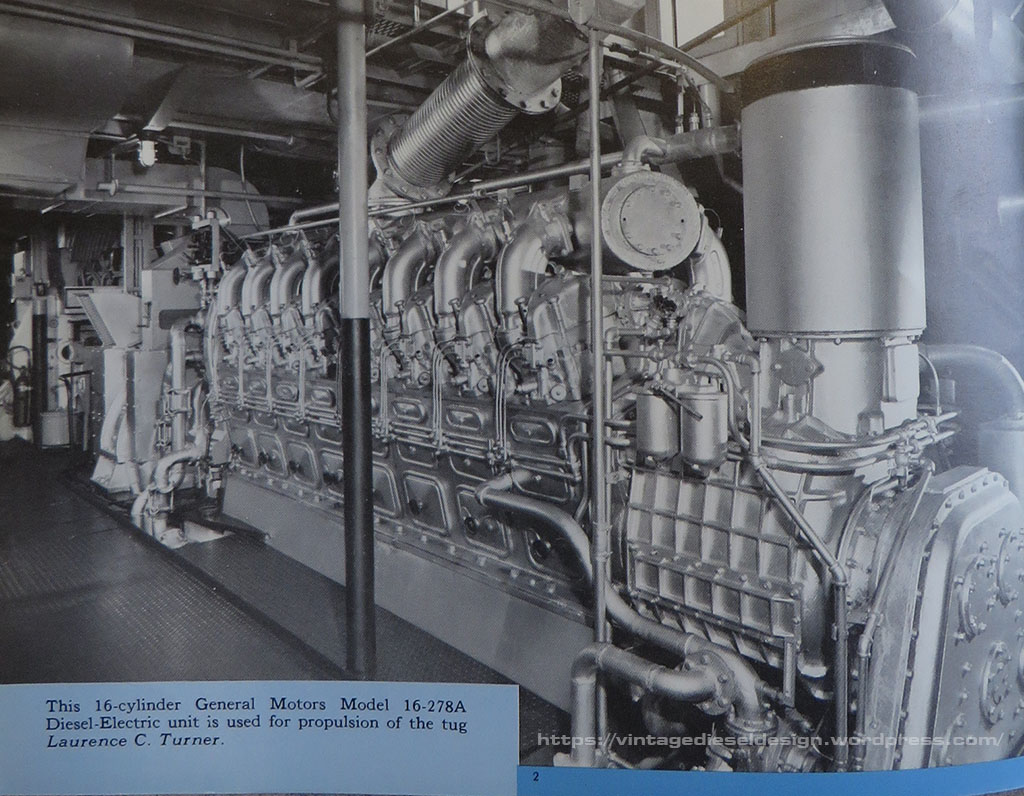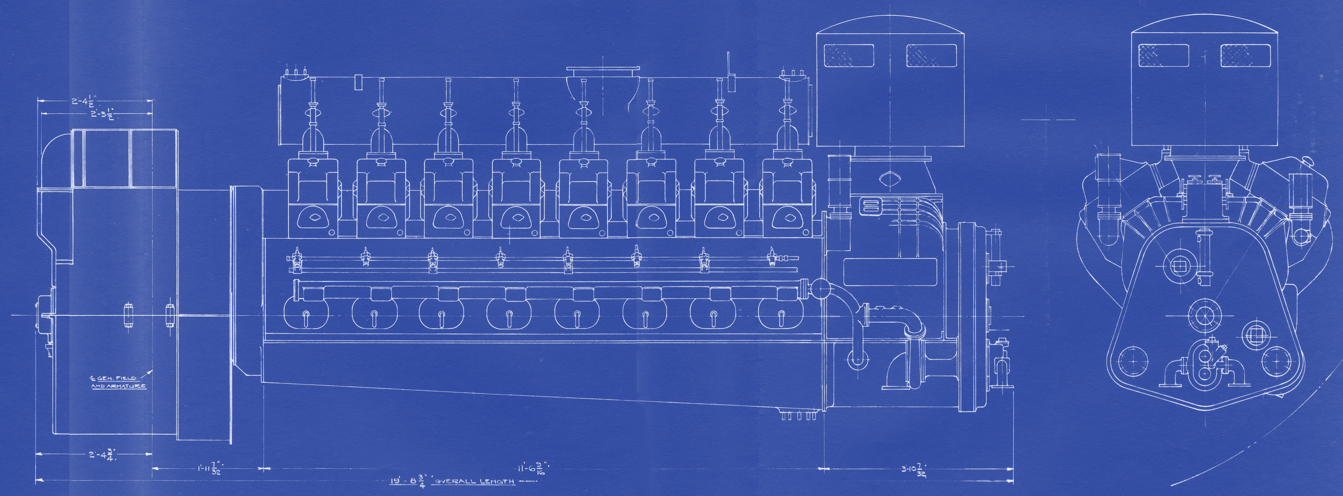
Ill start with a bit of prequel to this story with some history. The Tug Cornell is powered by a Cleveland Diesel “Navy Propulsion Package”, which consists of a Cleveland 16-278A and an Allis Chalmers 1090kW, 525V DC Generator, mounted on a common base. In turn, this provides power for a Westinghouse 1350HP electric propulsion motor, driving a Farrel-Birmingham single reduction gear. Except for the gear, all this equipment is reconditioned WWII surplus, Destroyer-Escort equipment. Lots more to come on this equipment in a future post.
Both ends of the main generator, as well as the forward end of the propulsion motor are supported by large, oil fed babbit pedestal bearings. The generator ones are fed by the main engine lube oil system, and the propulsion motor one is fed off the reduction gear oil system. The motor only has a single support bearing on the front, as the rear is supported by the reduction gear. In April of 2012, we burned up the aft support bearing on the generator; however, I will save that for later, as I documented this instance better.

In September of 2015, on a Sunday afternoon, we were just leaving with the tug to head down river, with another small tug (Pilot, Dave’s tug) alongside. The plan was to drop off the Pilot in Verplank, head to the city to pick up a barge, and then back to Kingston as we had training class days later in the week in Kingston. About 45 minutes out, just at the Esopus Meadows light just South of Kingston, I go down and do my engine room checks. I have my routine, I go down the stairs, around the front, back, around, back to the gear, and back up…so, coming around the front, I smell burning. The best way I can describe it is a burning electrical smell. I remembered the smell from when we burnt up the generator bearing. So, I kind of figured it was THAT bearing acting up again, I run around back looking for the thermal gun, and in the process put my hand on top of the motor bearing (part of my routine..), and yeah, at that point I knew what was really happening!
So, I get on the horn to the wheelhouse (we have a radio from the engine room to the wheelhouse) to go all stop, GET THE PILOT RUNNING!, and GET DOWN HERE!, I run for the hose to start getting water on the thing. (270 degrees on the shell right now). Dave starts steering, Don runs over and gets Pilot running (This is after we drained the fuel tanks this week, leaving only 50 gallons on the day tank…) Matt runs down and helps me start cooling this thing down with just water and rags. By now, we are just hanging out in one of the wider parts of the river. Pilot is running and ready to go alongside and holding us. Me and Don start tearing the oil lines apart to the bearing. We put air to it, and it shot a solid slug of crap out…
Now, the forward support bearing, is pressure fed from the reduction gear. Its a very simple system. There is a suction line from the sump of the reduction gear with a check valve, this goes to the pump driven off the main pinion. From the pump, it goes through a cooler, strainer, then T’s off. One line goes up to the support bearing on the motor, and the other goes to the gearbox, for the top spray line, and the pinion and thrust bearings (which are SKF ROLLER BEARINGS!) in the gearbox. All the oil is crystal clear and looks fine. it was just that one slug of shit, in the lowest part of the system. The system is only supposed to run at 110 degrees, at 5-8 psi.
So, we get this thing cleaned out, Pilot is holding us so we don’t drift all over the place ( Dave’s friend managed to see this from shore!) we get it back together, but we can’t get the pump on the gearbox to reprime quick enough to cool the bearing and get some oil to it. We thought we might have caught it before it went nuclear, but when we turned the excitation on (When you turn it on, the motor creeps sometimes), we got the nail on chalkboard sound.
Ok, Time to have Pilot turn us around, and tow us back to the dock. Nothing we are going to do out here now.

With the upper half of the pedestal removed, and the upper shell removed we saw the damage was done. All of the babbit melted out and then reset when it cooled off. What looks like scoring on the armature shaft, is actually just streaks of babbit.

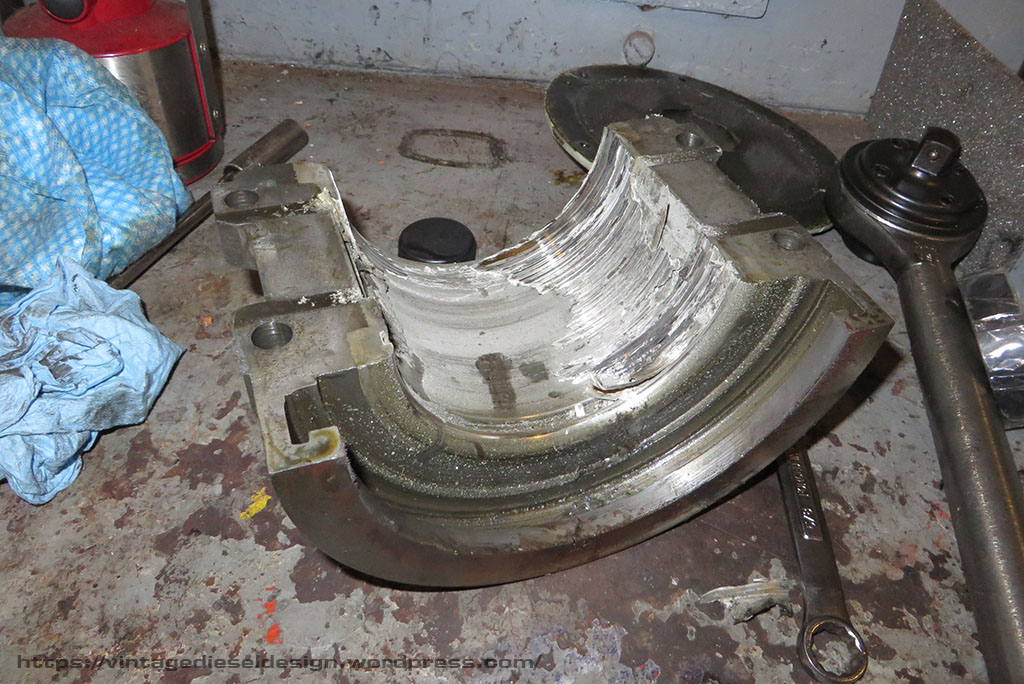


In removing the lower half of the shell, we made the observation that this has happened once before. Notice on the upper lip where it has been built up with brazing from where the shaft dropped and wore out the shell. Note the two oil drain holes in the center. Also, note the heat distortion. This shell got to over 500 degrees to melt that babbit in that fashion. Luckily, the shell was not warped.
So, a few years ago our fellow engineer friend Tim Ivory built a centrifugal bearing machine, to re-pour the main bearings in the tug “Spooky Boat”s Fairbanks-Morse 35F10M engine. Well, it turned out we were the first to make use of it two years prior when we cooked that generator support bearing. Since then Tim has made several bearings for various projects.
The barge in the city can wait until next week, but the class days Wednesday, Thursday and Friday can’t be rescheduled. Sunday night we got the shell apart. It is only 4 cap bolts, 4 shell bolts, and a pipe fitting into the shell for the oil line. After we got the motor armature shaft supported, the lower shell just spins out.
We were not able to do anything Sunday night. It turned out, Tim already had the bearing machine off the storage rack, and had one of the small, 2″ bearings for Spooky boats 1 Cylinder FM generator mounted in it to re do. We took care of that on Sunday to get it out of the way.
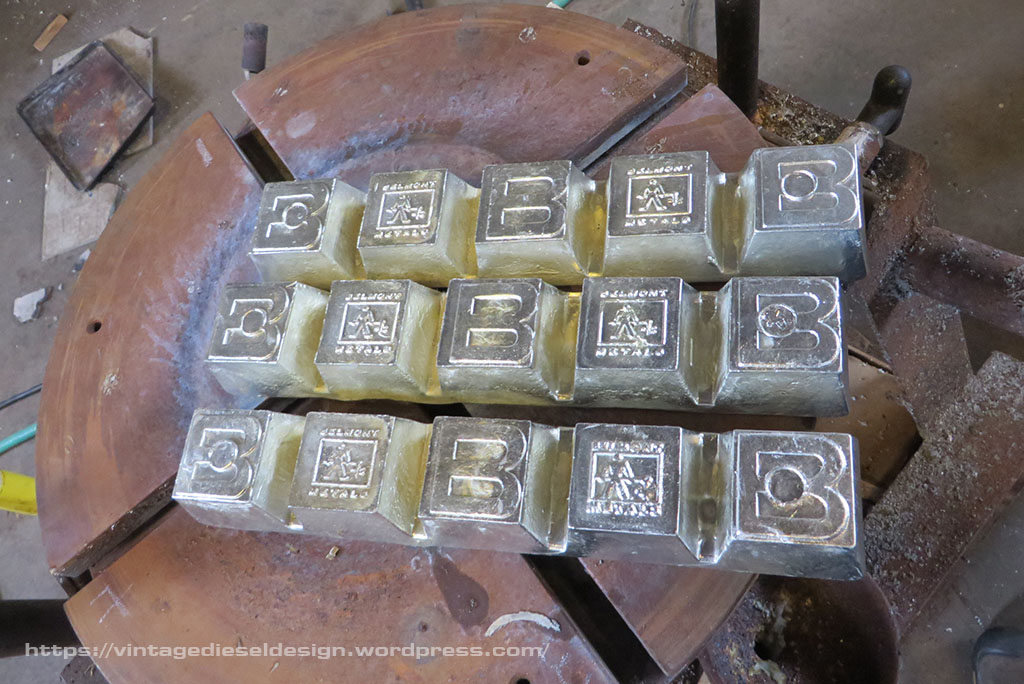
Monday, Matt (Owner of Cornell), had to go to the city and take care of a few things. Great, we found a foundry down there that has the babbitt in stock (Belmont Metals), and we can pick it up. Next, we need gaskets, The bearing mounts to the table using 4 studs and a plate. The shell needs a gasket where it meets the mounting plate, or the hot liquid babbitt just pours out all over. It is a 4″, ring style flange gasket, rated for hi-temp, usually graphite based, 1/8th” thick. We can’t source them locally. I found a place in Brooklyn that has them, I call them, tell them exactly what I need. Ok, fine no problem, 6 in stock. While this is going on, we prep the shell. Simply, melting the old babbitt out.

The next issue at hand was that we needed a plug. On the after side of the bearing, the outer edge of the shell rides on the larger portion of the shaft forming a mechanical oil seal. Unlike the bearing on the generator which used a labyrinth cut into the babbit, this bearing just have a tight tolerance fit, and thus we need to keep this entire area clear of any babbit. Tim had the great idea to make a simple one out of the bottom of an old scuba tank!

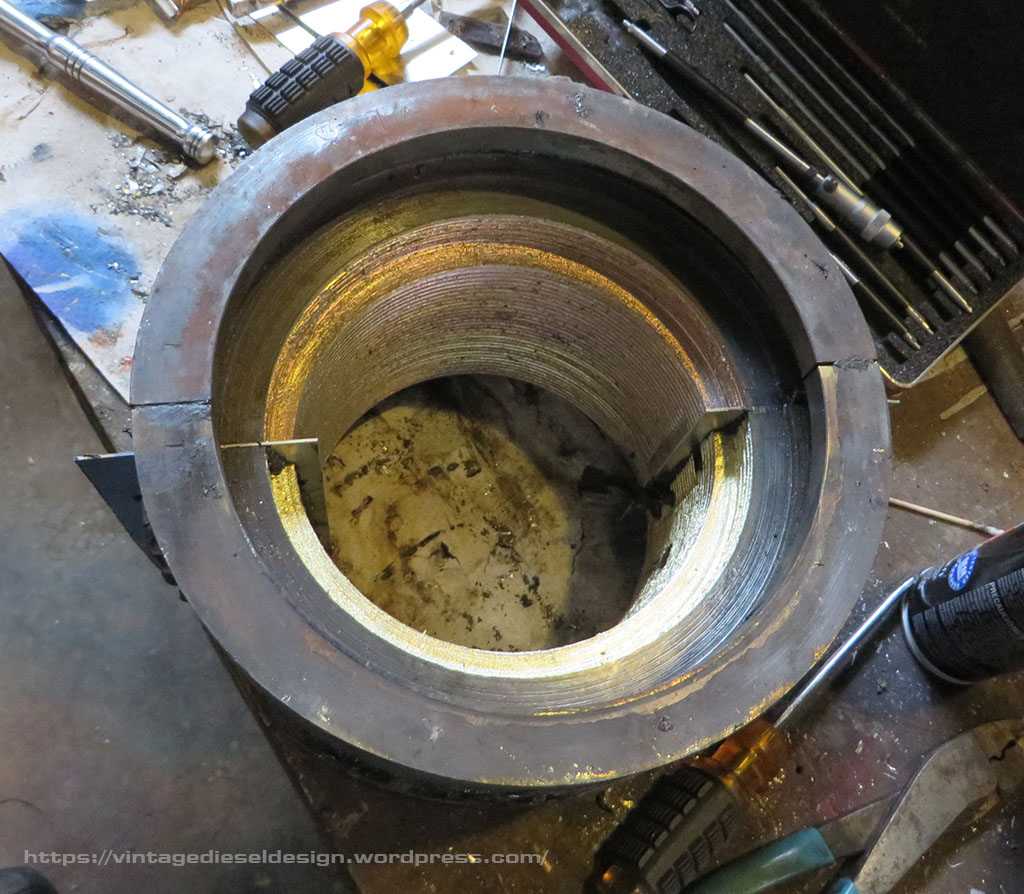
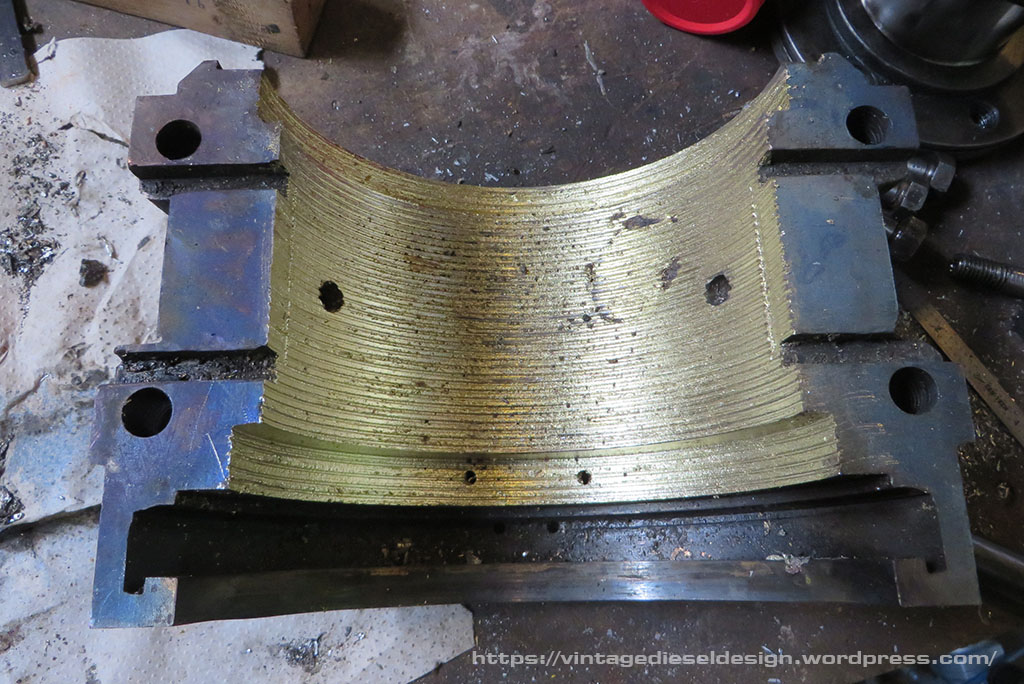
After the bearing is cleaned out and tinned, the halves are bolted together with an aluminum shim plate, which is sealed with hi-temp silicone. The shims create a space so that the shell can be split apart after the babbit is cooled, and the babbit wont stick to the aluminum.

Now, Matt shows up with the gaskets Monday afternoon…totally wrong thing. Back to the drawing board. I managed to find a plumbing supply house about an hour away. We shoot down, and start telling them what we need, and comes the typical “What is the application..” Our response, “Can you just take us to where you keep them, and we will get what we need?” They take us to them, score! they had what we needed.

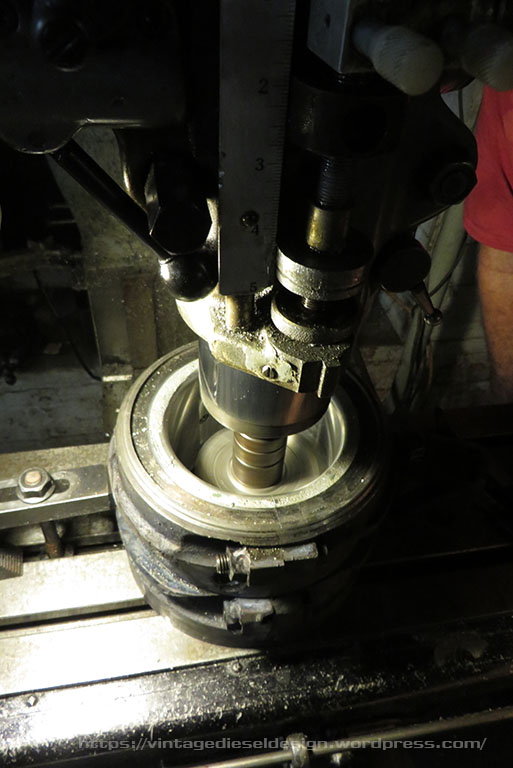
The shell itself is sandwiched into the machine using 4 studs attached to the bed plate, and a steel plate with the center cut out. After a few minutes getting the bearing centered and balanced, it is ready to go. Each of the 4 studs is wrapped in fiberglass insulation to help prevent the stud from stretching, and have stiff springs outside of the plate to take up and stretch while being heated, and even still they are periodically re-tightened. The gasket sits between the top plate and the shell.

Next up, rotating the assembly down 90 degrees and preheating the bearing using the roofing torch to around 500 degrees. In the background the babbit is being melted.
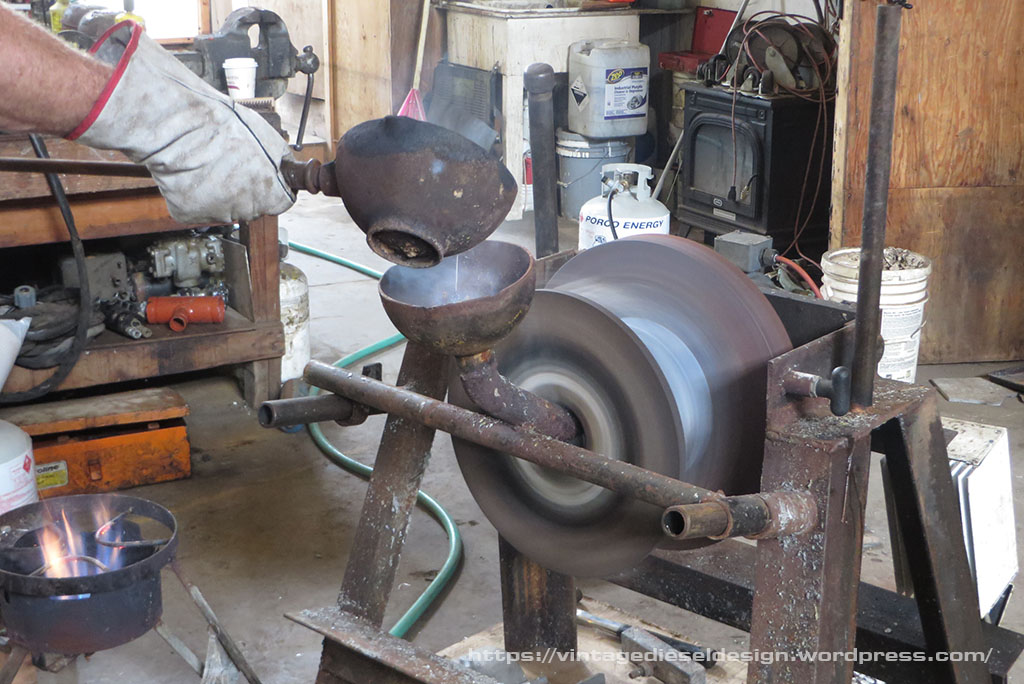

We melted 12 pounds of babbit and poured in about 9. After pouring, the shell is immediately hit with water to cool it. This is so the shell cools and shrinks from the outside, so the babbit does not crack.


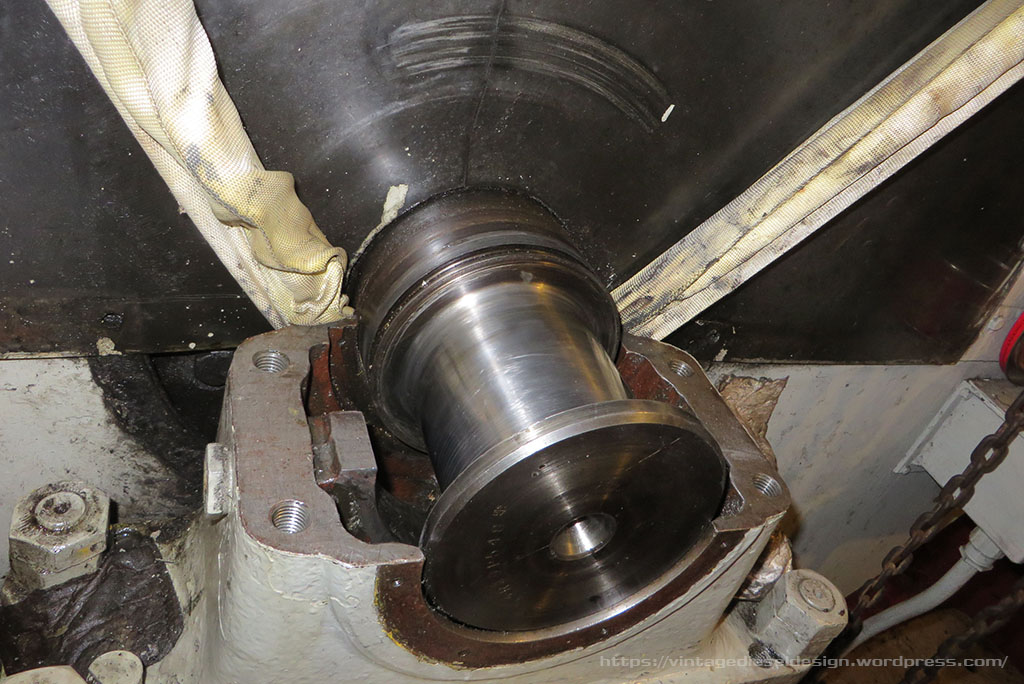
With the new babbit poured, we went back and cleaned up the shaft. It had some very, very light scoring on it that we were able to polish out. We took a slew of measurements, and were now ready to machine it.


We put the thing back together about 11pm on Tuesday, figured out how to get the oil pump reprimed, cleaned all the lines out, and started the boat about 11:15. We spent the next hour running it, getting it scrapped in with a razor blade and bluing dye (run for 25m, take it out, scrape…repeat..). We used timesaver compound (an old timers trick for babbitt bearings, which alot of old manuals for big engines specifically say to use for this exact purpose), to help get it wore in.
The class days we took it easy, no more then 100 shaft rpm (so about 400 on the motor). We never seen more then 100 degrees on it. Here we are almost 4 years later, and the bearing runs perfectly fine, and stays right around that 110 degree mark. For all intensive purposes, we were able to turn this repair around in around 48 hours, completely in house.
Since this happened, not only have we managed to acquire a spare support bearing shell set, but I even managed to find an original Cleveland issue manual, that covered the Generators, Motor and the pedestal bearings for both, with complete spec sheets.